Tuesday, September 25, 2012

Published in Somerset Life Oct/Nov/Dec 2012

I love receiving my complimentary issue of Stampington magazine when ever you get published.
 In the current issue of Somerset Life, I was excited to have two articles. The following one is titled, "Vintage Button Cards", however, there's a slight problem. They photographed a different project of mine with the story.
The project photographed was my 7-Gypsies portfolio project. The inside is filled with embellished envelopes - but no buttons. This was not my vintage button card kit.
I know mistakes happen, so I apologize for anyone who reads the article and was confused at the corresponding pictures.

My second article was supposed to feature a black and white necklace, but the photographs were for a different necklace that I had made.
So, if you're reading the article and wondered why it doesn't make sense when you look at the pictures - now you know why.

On another note, I had a wonderful time at Art-Is-You in Petaluma. I took a bunch of pictures, so it will take me awhile to go through them and share with you a glimpse of the event...stay tuned.

Sunday, September 16, 2012

Doodling on Gem Tintypes & More

In my last project, the matchbox shrine, I used a photo copy of a Gem tintype and altered it with a white gel pen. Doodling on that tintype was so much fun, I decided to continue and doodle some more...hahaha!
I recently purchased a digital sheet of Gem tintypes from this etsy site: http://www.etsy.com/shop/theartfloozy. This is how it originally looked:
As I started to doodle, I decided to Google search if anyone else has done this. Sure enough, Stephanie Jones Rubiano has done some wonderful images, back in 2009. I used some of her ideas and added some of my own. She's an amazing artist, I just love her work! http://www.stephanierubiano.com/home.html. I'm going to add her to my blog list now. BTW, I just used a white gel pen for my doodling.

Next up, I want to share with you a wonderful find from Michael's.
In the jewelry department, similar to Susan Lenart Kazmer Industrial Chic, is another brand called art-i-cake by Amy Labbe. She has these adorable pieces with reproduction china doll heads. These were the two variations I saw.
I took the piece that's on the spoon and created the following necklace.
I used some sandpaper and took off some of the black paint on the hair, just to distress it a little and take off the gloss. Then I added a piece of vintage text and number just to personalize it a bit.
I also changed out the two clear beads that dangled from the spoon, and instead used a disco ball bead and a tear drop pearl.

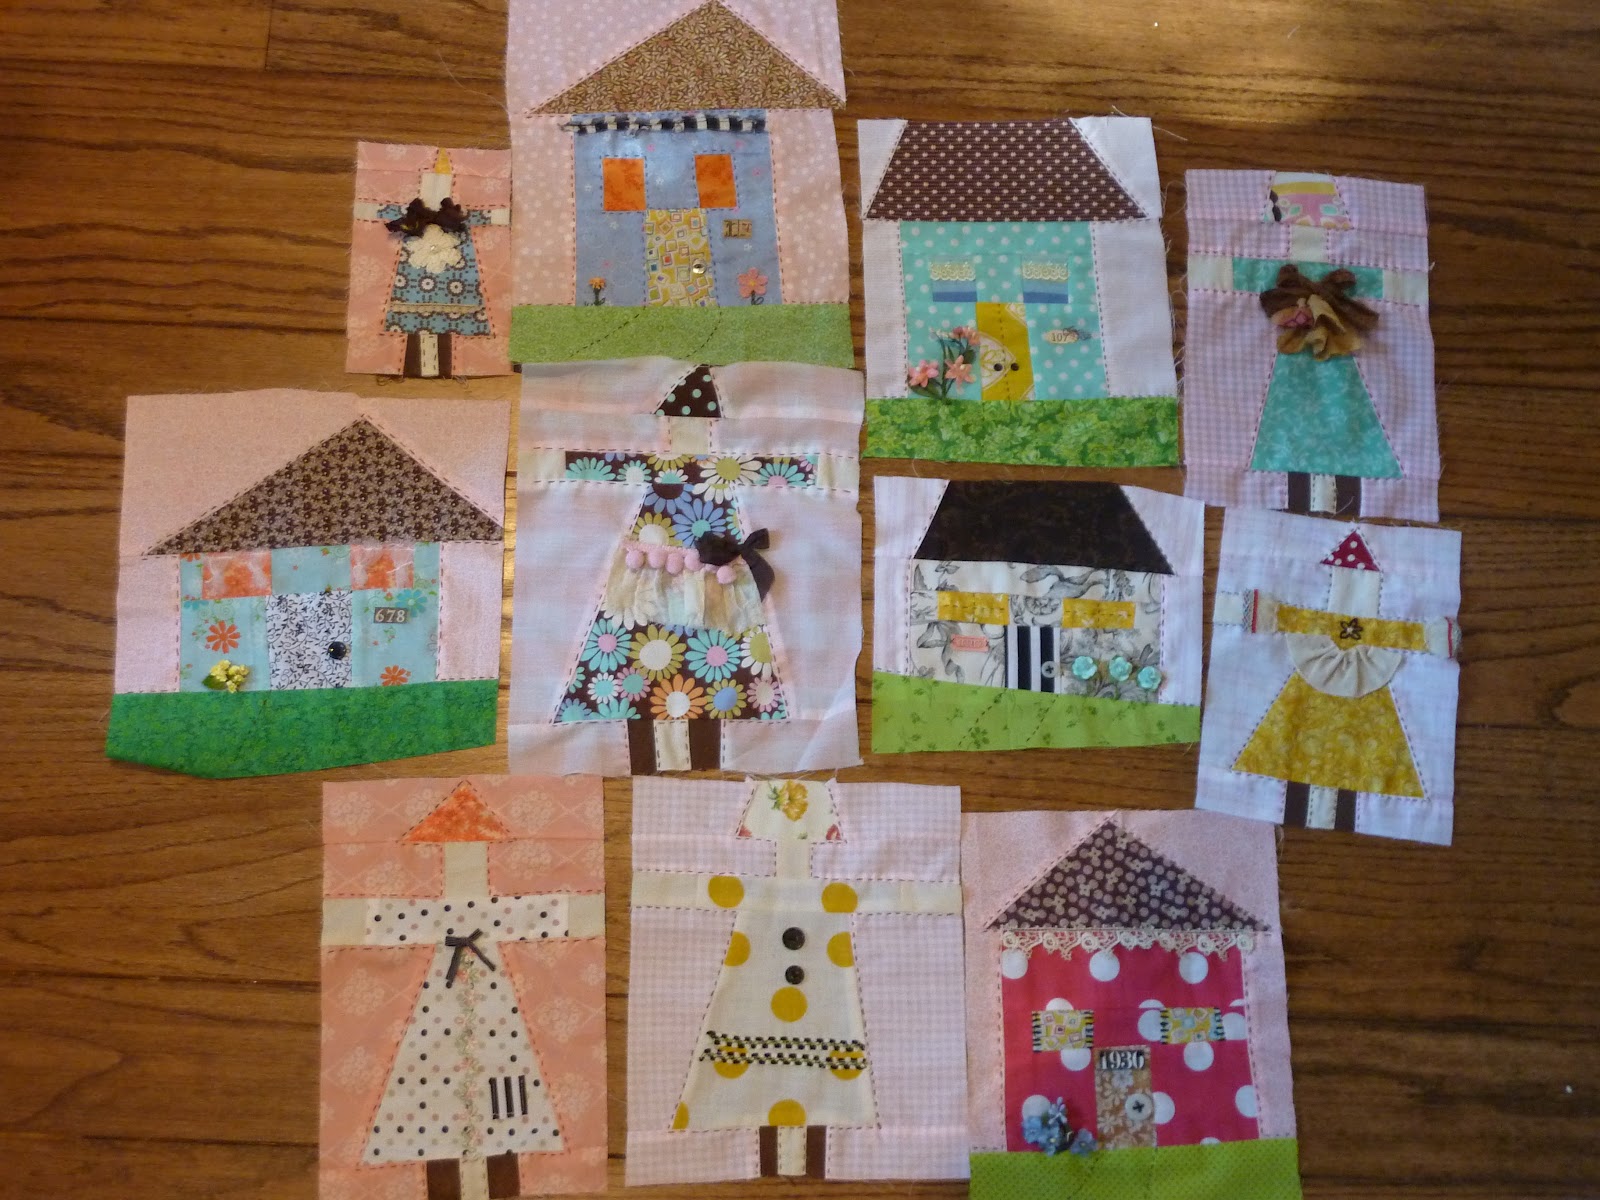
And believe it or not, I also worked on my doll-house quilt this weekend! I finished embellishing another 10 panels.
Below, is a picture of all the completed panels that will be used in my quilt.
I purchased my background and border fabrics this weekend, so now I'm all set to start piecing this all together.

Coming up this weekend, is the Petaluma Art Is You convention. I'll be taking four workshops from some wonderful artist and also seeing some of my artist friends that I've met last year. I can't wait! I'll be sure to take lots of pictures. Have a great week everyone!

Thursday, September 13, 2012

My Matchbox Shrines

I recently signed up for a couple of on-line classes from Lesley Venable (http://theartofaltering.ning.com/) . I know, another diversion from working on my quilt. :-) I figured these were just some quick projects that I could fit in between larger projects. I signed up for Matchbox Shrines and Composition Journals, however I don't think the class is being offered anymore. It's fun to get ideas from others, and I haven't altered a matchbox before.

Below are the two matchbox shrines I made. One of them opens like a book and the other slides through.
These were so much fun to make...quick, simple and doesn't take up much space on my craft table.
The matchbox was covered with vintage text and embellished. I added one of my molded frozen charlottes inside.
For the one above, I inserted a transparency of a gem tin type that I embellished with white ink and a small piece of dresden. I also added a bit of lace, vintage flowers and buttons.
Thanks Lesley for inspiring me to make my own matchbox shrines, your on-line class was great! I know this is nothing new in the craft world...but it's new for me. I'll post the output of the composition journal soon...but not until I do some work on my quilt. ;-)

Thursday, September 6, 2012

Domino Dolls

Okay, I already got side tracked from working on my quilt and made these Domino Dolls.
I purchased some dominoes a long time ago thinking that some day I'd alter them into something else and that time finally came. Of course, the first thing that came to mind was to turn them into dolls. Below, is the first one I made.
The head is paper clay that I made from one of my molds. Using my dremel tool, I drilled small holes for the legs and arms. The arms came from a Catherine Moore stamp from her "Inner Child" collection. The legs are narrow pieces of paper folded around wire. I collaged the body and added an accordion skirt made from a page of text.
For the domino girl above, I used the same stamp from the girl above for the head. I used sari ribbon and sewed a skirt that I glued around the waist. I drilled holes for the legs and used the same technique of folding paper around a piece of wire.
The domino girl above reminds me of a ballerina. I glued an image of a china doll head to the top. I cut apart a dress from one of Joanna Pierotti's digital sheet for the skirt. You can't see the arms too well in the photo, but I took some wire and threaded some vintage lace though it. Now that I look at this one, I think her head is too big, I might have to switch it out later.
My last domino girl is Marie. I made her skirt from a piece of wired burlap. I stamped the image of Marie from Catherine Moore's "Queen of Tarts" collection and cut out just the head & arms and glued them to the domino. Lastly, I sewed on a vintage skeleton key and bow.
Hope you like my new collection of domino girls.

Monday, September 3, 2012

Picking up My Doll-House Quilt Again

You might remember long ago I started a quilt of dolls and houses. I never did finish it...in fact it's been a few years (2009) since I worked on it last. I've been feeling guilty that I had another unfinished project sitting around, so this weekend I decided to pick it back up. This was a perfect project for this weekend, since I was too sick (caught my son's cold) to leave the house.

This is where I left off...
above I sewed 13 girl patches...
and 8 houses. The finished project is supposed to have 14 girls and 11 houses. This isn't a kit and there wasn't a pattern - but there was a picture of this adorable quilt in a book called Material Obession...so I opted to try to make it myself.
Each image is supposed to be outlined with a running stitch and then embellished. So that's what I worked on this weekend. I was on a roll and finished 11 panels.
After looking at them, I decided to add eyes to each of the dolls. I use to love my Joan Walsh Anglund dolls and so I tried to replicate their faces. Below is a closer look at the dolls.
And the finished houses.
We'll see how long I can keep this going before I get tired of working on it again. Creating the panels is probably the best part of making this quilt - after this, sewing them together into one large square with a filler background fabric (which I have yet to purchase) will be a challenge, since all my panels are different shapes and sizes.

Hope you all had a wonderful Labor Day Weekend!

Sunday, August 26, 2012

More Miniature Furniture Dolls

I made a few more dolls made from miniature furniture pieces that I recently purchased.
It's really a creative challenge to see what you can do with a sink, cabinet and a bath tub.
I filled the bath tub with red flowers and glued her body around the tub.
For the cabinet piece, I gathered some ribbon and glued it around the middle for a skirt. Then I glued on the head and legs.
Below is my sink doll...
I turned the sink upside down and glued on a head, wings, skirt and legs.
That concludes using up all my different miniature furniture pieces and transforming them into something different. I hope I've inspired you to think outside the box.
Here's all my altered miniature furniture pieces.
Have a great week!

Thursday, August 23, 2012

My Swap - Paper Clay Art

Next month, I'll be attending the Art Is You Convention in Petaluma...I can't wait! Last year, I learned that at these conventions some of the attendees swap small items. A couple of people were so generous and gave me a swap item, even though I didn't have one to trade. So this year, I'm prepared.
I made these assorted paper clay charms. I used one of my favorite stamps from Invoke Arts and stamped on some white paper clay. I used the Crayola brand called Model Magic.
After stamping, I cut around the image. Then I decorated them in assorted styles; added some ribbon, tags, text, lace, etc. I added an eyepin to the tops so that it could be hung from a chain or ribbon. I tied a bow though the eyepin with some twine and inserted the charm into a bag, lined with some vintage journal paper.
I designed my own little "business card" to be inserted into the back. I used my recent education from the Photoshop class I took from A Work Of Heart in San Jose.
There's a couple of variations, but I did use my signature doll that I have in my banner as my trademark. My first piece of digital art. :-) I'm looking forward to swapping at the convention - I'll definitely post the swaps I receive.

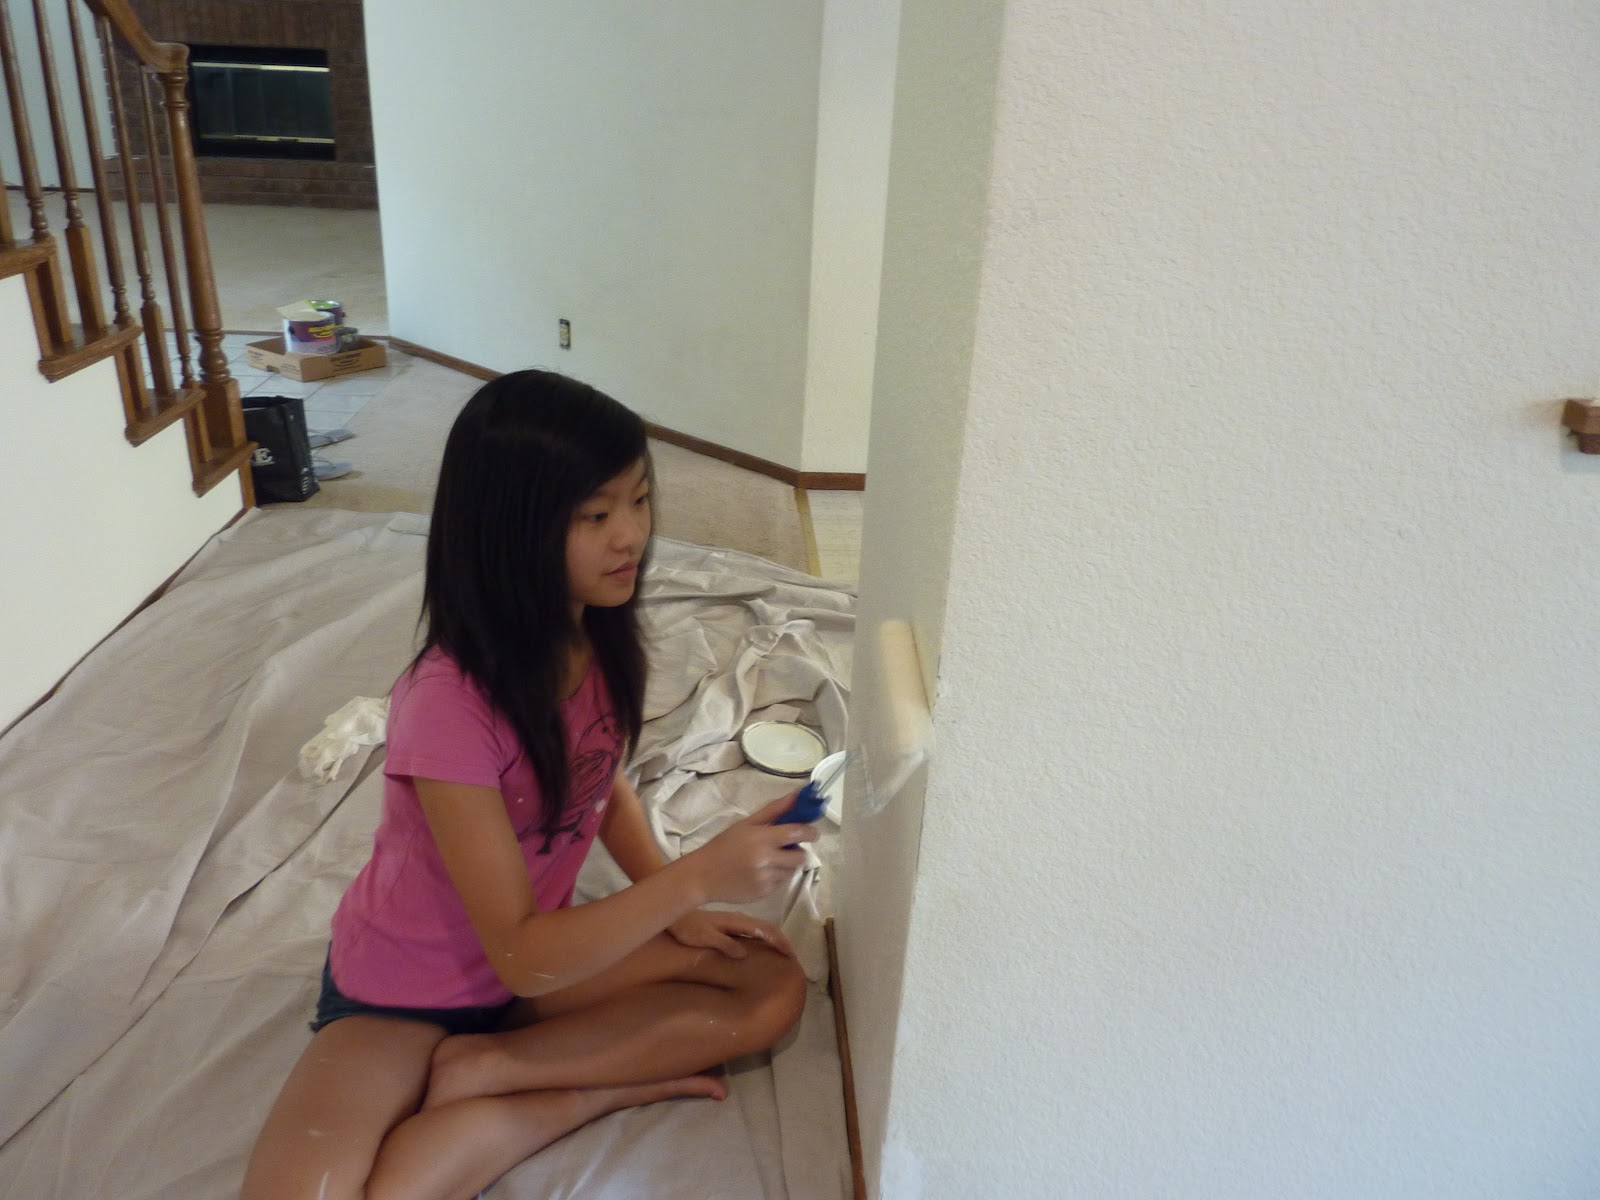
On another note, lately we've been very busy with getting our 2nd house ready to sell. We've been cleaning and painting during most of our spare time. I even turned down going to our company sample sale last weekend to do some painting.
 The kids enjoy helping us too!
It's going to take us many more weekends to get the house prepared for selling, but it's been kind of a fun family activity. I appreciate your comments on recommended classes, but I'll be pretty busy these next couple of months, so I probably won't be teaching again until next year. My kids also started school this week - both in high school now! I can't believe how time flies and how quick the summer goes by. My eldest son is a senior, so he'll be applying to colleges this Winter. Oh my, the thought of him leaving home brings so much sadness to my heart, I know we'll miss him so much.

Hope you had a good Summer!