Thursday, June 30, 2011

7 Gypsies Portfolio Project

A few weeks ago I purchased these 7 Gypsies portfolio brochures. It was the same one we used for the Portfolio class I took with Deb and Paula from 7Gypsies last month, but a smaller version. Here's how I covered the front...
 This is how it looked before I started. The size is 7" x 9".
I'm going to work on the inside this weekend, stay tuned and I'll show you when it's finished.

I also wanted to share my latest foodie fine: PURPLE CAULIFLOWER. After watching one of Dr. Oz's shows, I wanted to try purple cauliflower because it's full of antioxidants.  Look how beautiful it looks in my salad too!
 
Most nights I eat a large salad and a small portion of protein (chicken or fish). Now, I love to add purple cauliflower to my salad for the looks and the taste. Season it with salt, pepper and olive oil. Then roast the cauliflower in the oven at 350 for about 40 minutes - and yum, you'll love it! The only problem, it's hard to find. I've only found it in one store, Berkeley Bowl. So every week, we make a trip there and buy 3 heads of purple cauliflower. It tastes the same as white cauliflower - just looks better and it's better for you.

Sunday, June 26, 2011

Metal Etching

In the recent issues of Belle Armoire Jewelry, there have been a of couple articles on copper etching and I couldn't wait to try it.
The photo on the left was in the Summer issue of Belle Armoire Jewelry, article by Lynn Stevens. The item on the right is my attempt at this project.  I bought the brass and metal sheets (26 gauge from Otto Frei). You also need ferric chloride, which I found at an electronic store in Berkeley. Here are some of my steps.
Stamp with StazOn ink. The sheet on the left is brass, the sheet on the right is copper.
Keep the ferric chloride in the garage with the other household chemicals. Suspend your metal in a plastic tray in the ferric chloride. 3 hours later you wash with baking soda and water and it's done.

Below is another project I did - a mini book inspired by Janet Loomis in the Spring issue of Belle Armoire Jewelry.
I found it's not easy to stamp on metal, it's very slippery. They have this product called StazOn remover that easily removes your image, which I must have done about 6 times before I got a clean image. And working with the ferric chloride is kinda scary - something that can eat away at metal is strong stuff, but it works! I like working with small pieces the best.

My Daughter Published In "Create With Me"

Stampington & Co. just released a new publication called, "Create With Me".
My daughter is so creative, I really wanted her to submit some of her work.  We were happily surprised when we found out she was going to be in the premier issue. I love how they did the layout with the milk and cookies surrounding her work. I'm so proud of her and hope she continues to create for a very long time.

 Here's some more of her latest creations, sweet treats...definitely looks good enough to eat!

Thursday, June 23, 2011

Published in Somerset Life

It's on the newstands, the July issue of Somerset Life and I have a 4-page article!
It's a bracelet I made for my sister Maryl's birthday this past January. I actually made her two bracelets and let her pick one.  Unfortunately, she picked the other bracelet, that didn't get published...too bad sis.
I stopped by Scrapbook Territory in Berkeley today and needless to say, picked up some new items...stamps, embellishments, jewelry findings, embossing plates etc.
I'm really interested in metal etching after reading some articles in Belle Armoire Jewelry. Today I found a local jewelry supply warehouse within 10 minutes of my house and it's open to the public. The store is called Otto Frei; here's their web site: http://www.ottofrei.com/store/home.php. I was looking for copper and brass sheeting and this is what I bought.
Stay tuned for some metal etching this weekend.

I also wanted to share what my daughter did these past few days.  In my previous post, I mentioned how we bought these wooden frames from Michael's.  Here's how my daughter decorated her frames.

It's a Japanese craft called deco-den.  You take some hardware store silicone and add embellishments usually called cabochons.  My daughter made all the embellishments on these items. Any flat surface around our house is now subject to being deco-denned!

Sunday, June 19, 2011

Unfinished Wooden Frame Transformed

Last week, Michael's craft store was selling unfinished wooden frames: 3 for $2. My daughter bought a couple to decorate with her clay projects and I bought a square one (7 3/4" x 7 3/4") to use for my art.
I painted the edges of the frame with black acrylic paint. This week, I purchased this script image (http://www.etsy.com/transaction/51925144) from etsy and enlarged it. I printed the script font on kraft paper and covered my wooden frame. I like this frame because the center is sunken a bit, so you have a shallow shadow box. I added bits and pieces from my stash.

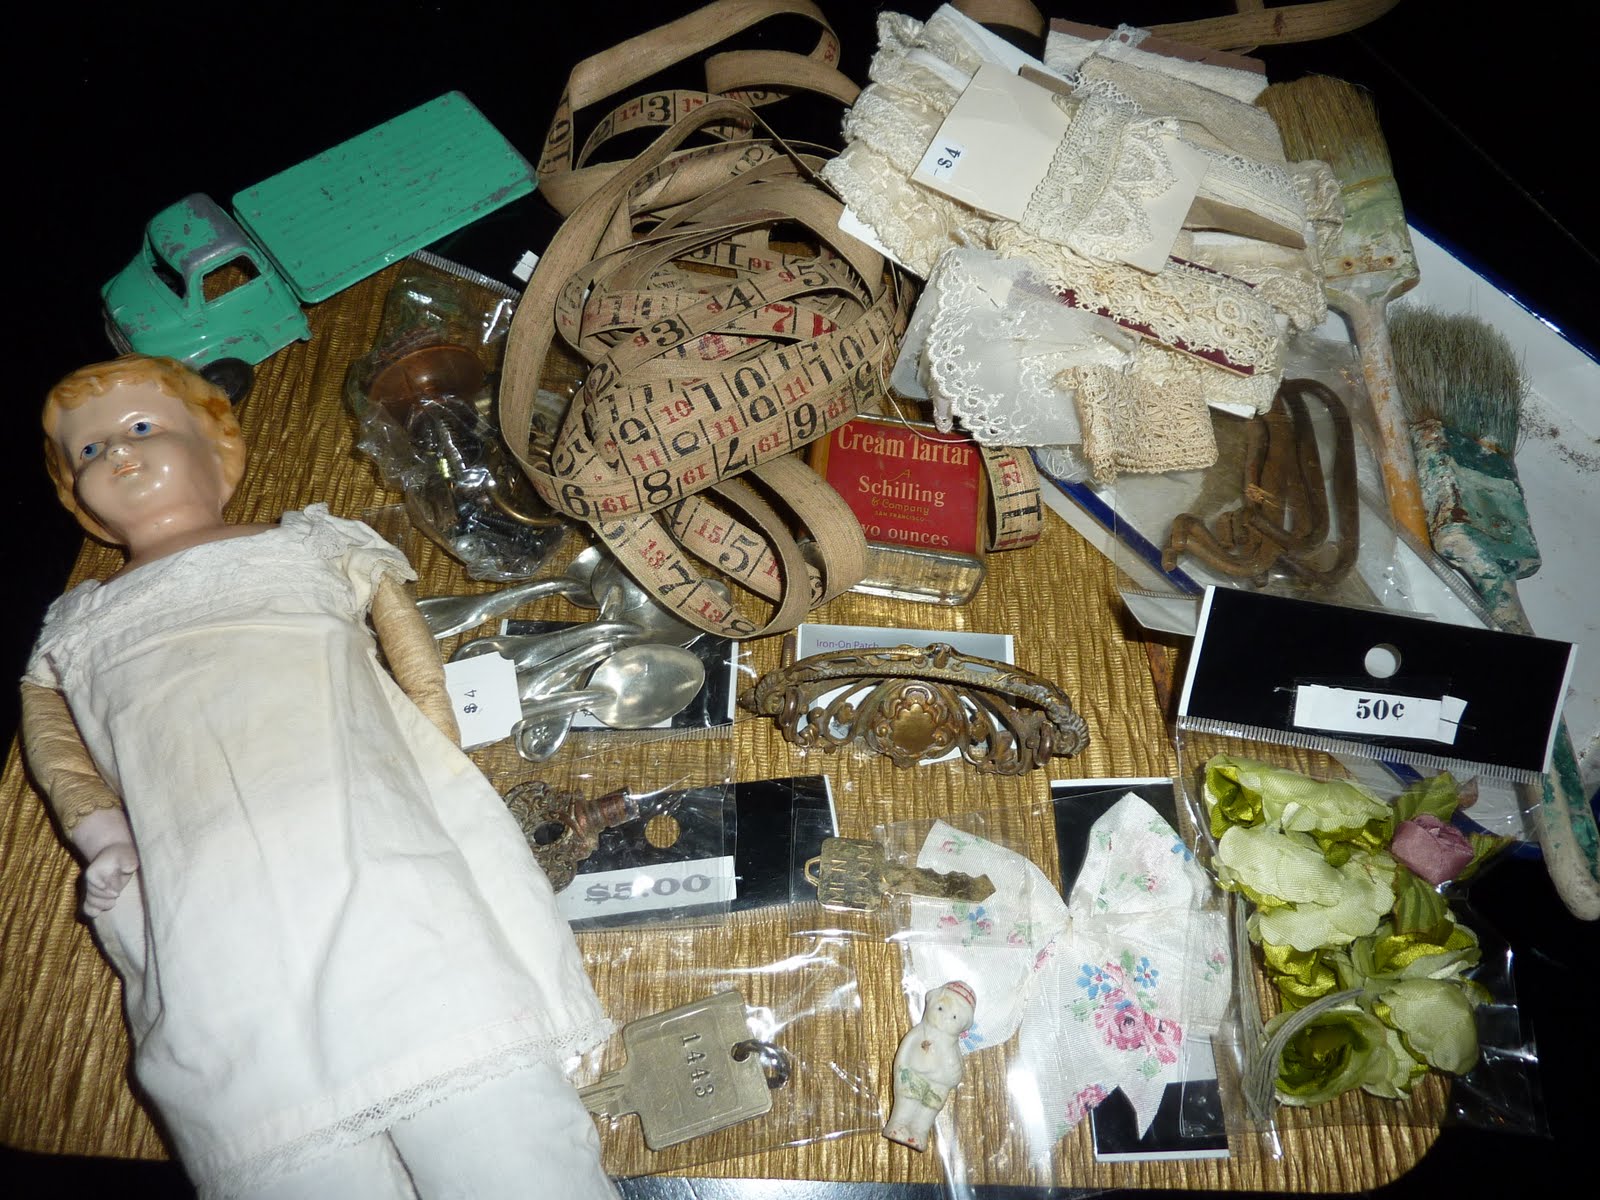
Yesterday, I went to the Addison EndPaper sale. I know I just went last weekend, but they advertised a blow-out sale to clear out some of their backroom inventory. So, needless to say, I have more great vintage finds to add to my collection.
To celebrate Father's Day, my husband always wants me to make strawberry cream cheese cake. I got the recipe from America's Test Kitchen (http://www.americastestkitchen.com/recipes/detail.php?docid=7612).  I made it few times before, but this time I rushed a step. When whipping the egg whites for the cake batter, I knew I had a bit of egg yolk in there.  That's definitely a no-no and my whites never did get to the stiff stage, but I made the cake anyhow.  The cake didn't rise enough to make three layers, so I thought, no biggie, I just have a two layer cake now. This is how it turned out.
It still looked good and my husband said it tasted good, but the cake part was very dense. Shoot, I should have re-done the egg whites when I knew it didn't get stiff. It bugged me all night, so I knew today I had to remake the cake part, dissemble the cake and put it back together again. Here's the new and improved cake, made into a trifle-type dessert. The cake part is 100% better and now it's really 3 layers!

Friday, June 17, 2011

Re-Upholstered Doll Furniture

The other week I bought an old doll chair for $3.00 at Craft Depot. Connie Stuart suggested I should re-upholster it and I was up for the challenge. I pulled off the red cushions...

Before
 
 Then I took some neutral color fabric and ironed on a Paris image.
Then I glued it on the chair and I was done! An updated chair, just like that.  Okay, so maybe it took me about 3 hours to really remove and sand down the old glue, cut the fabric and glue back on the cushions, but it was a day project and it wasn't very difficult.
After
I read that the Avery Fabric Transfer paper works the best and that's what I used for the chair. As I was looking for images for the chair, I also bought other images to use for other projects. I had fun enlarging the images and printing them out. I made that necklace on the chair from one of those images printed on burlap and embellished with a rhinestone pin, tulle, pearls and ribbon. More to come on image transfers, this was fun!
I bought the images from these sites: http://www.etsy.com/shop/room29?ref=seller_info; http://www.etsy.com/shop/tatteredvintage?ref=seller_info; http://www.etsy.com/shop/Graphique?ref=seller_info.  Only $1 each too! The one thing to remember is that before you print any text, you MUST flip the image, so that the text irons right side up. I printed some of the images on inkjet printable fabric too, to be used for some future project. I'm going to work on that picture frame this weekend. I love that large script font.

Wednesday, June 15, 2011

Vintage Finds

Last weekend was a triple hitter for antique shopping: Addison Endpapers sale, Alameda Pt. Flea Market and a large estate sale close to my house. All my favorite places to visit. My best finds included: Minerva doll from the 1800's (the head is painted tin), doll roller skates, iron bed, mini salt and pepper shakers. I used one of the salt and pepper shakers for a necklace. I used bits and pieces from my stash, turned the shaker upside down, dangled some odds and ends at the bottom and I've got a conversation piece to wear.


Some scenes from Alameda Pt. Flea Market.

My sister, Maryl picked up some great items too.  Here's her haul.


Love this vintage candy display she found, too!

Sunday, June 5, 2011

Bisque Casting

Yesterday, I had so much fun molding and casting, I couldn't wait to do more.  Thanks to Colleen Moody for bringing an adorable bisque doll, I was able to make a mold of her doll and create this little project.
For the doll, I used Sculpey clay and painted it with Sophisticated Finishes (http://www.modernoptions.com/) in blonde bronze and patina green and added a bit of brown acrylic paint. For the door, I used the back side of a mini canvas (3 1/2" x 2 1/2") and just painted it with Tim Holtz's Distress Stain in the colors broken china and peeled paint.

Today, was also my daughter's Spring Ballet Recital, held at Holly Names College.  Here's a pic from the rehearsal and then a shot of her right before going on stage. It was her first performance on point shoes, it was beautiful!
I did have a couple hours in-between activities today, so I ran down to craft depot. I got a big book (c 1956) that had the middle already cut out, which is definitely the hardest part of creating niche projects. I also found a box of glass domes in all different shapes. These will be great for projects, too. I also purchased  some wire, a vintage necklace and old paint tubes.