Sunday, February 26, 2012

Button Card Class

Yesterday, I had a great group of friends over for a Button Card Class. I made some very basic samples, but these girls went over the top with their button cards. The set below was made by Diana.
This was the class kit I handed out.
Below is a photo of Irene, Diana and Lois. 
This set was created by Lois.
Below is a photo of Lois, Maryl and Ruby.
This group of cards was made by Irene.
It was a fun day of cutting, pasting and sewing.
This set was created by Maryl.
I just have to share the thoughtful gifts I received from my friends. Ruby gifted me with her favorite organic bouillon for making soups. Diana made this adorable wool felted heart. Irene made some amazing earrings. Maryl gave me this cute Cutex box from the 50s and a delicious lemon meringue pie.  Lois, I love the envelope you presented me with your payment. Geez guys, an apple would have been just fine.
This set was created by Ruby.
I just love how all the cards turned out! Thanks to October Afternoon for coming up with this line of paper called Farmhouse.

Thursday, February 23, 2012

7 Gypsies Guest

In January, I was asked by the head designer for 7 Gypsies, Debbie Crouse,  if I would be interested in creating a project to display in the 7 Gypsies booth at CHA. Wow, was I thrilled and immediately said yes! Here's the end result.
Here's a bit about the journey.  I was sent a box of really cool 7 Gypsies products...
I was asked to turn the library drawer into a shadow box. I came up with an idea in the middle of the night and immediately sketched this image.
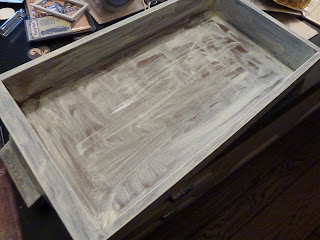
The sketch gave me a good jump start into what I needed to do. First, I gave the drawer a white wash.
 Then I started to build my sections. I used the rulers as my shadow box dividers.
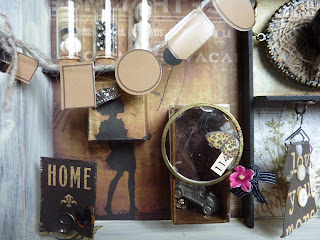
I love the mini apothecary domes. I filled mine with buttons, rhinestones and a frozen charlotte.
I made a banner from the apothecary stickers.
This was such a fun project and I'm honored to be a guest on the 7 Gypsies blog today: http://www.sevengypsies.blogspot.com/. Thank you Debbie and Paula for your confidence and support.


Saturday, February 18, 2012

Pickup Truck Pin Cushions

I've been inspired by Cathe Holden's post on vintage pickup trucks from a couple years ago. She created a pin cushion from a toy truck, and I couldn't wait to do the same. http://justsomethingimade.com/2010/05/quirky-collections-vintage-trucks/. Lately, I've been on the hunt for cute match box style pickup trucks. I scored today by finding four trucks at Safari Toys in Alameda.
I now have this collection of 8 pickup truck pin cushions. They're very easy to make. Take a small scrap of fabric and baste around edge. Fill with stuffing and pull thread to make a ball. Glue the fabric ball into bed of the pickup truck...and that's it!
If you look for these trucks at Alameda Point Flea Market, they usually go for about $5. At the Safari Toys store, they have 9 bins of match box cars/trucks for just .95 each and then the special vintage ones are locked in a case for $10 and up. If the trucks look too new, I take my emery board and scuff off some of the paint. I needed at least 6 for my students, to keep their needles handy. Fun, quick project!

Then on a side note, these past couple weeks, I've been working on framing restaurant articles for Shan Dong - that mini restaurant re-model I've been helping out with. Here's how they came out.
Also, you have to see my daughter's nails this week. I'd say this is shabby chic inspired.
Lastly, here's some more of my daughter's creations today. They're hand drawn images placed into recycled bottled caps and covered with Mod Podge Dimensional Magic. Too cute, I love eye's on anything now :-).
Have a great President's Day weekend!

Tuesday, February 14, 2012

Happy Valentine's Day

I hope everyone is enjoying a Happy Valentine's Day. I just wanted to share some Valentine photos.
My daughter, Rachel, made these Valentine rings and a pendant made from Sweetheart candies. She used resin & glitter to cast the real candy in a mold and made these adorable jewelry pieces. I wore one of the rings today and it made for a great conversation piece at work.
This is a Valentine collage my daughter made for me. I just love it! Below are my daughter's nails painted by her, especially for Valentine's Day.
I also received this lovely Valentine's Day card from Catherine Moore. I adore her stamps and love her work!
And lastly my beautiful roses from my adorable husband.
What a lovely V-day!  Hope you all had a great one, too!

Sunday, February 12, 2012

Debina Pratt's Birthday Workshop

Today, we celebrated my sister, Maryl's birthday by having a workshop taught by Debrina Pratt, hosted at Maryl's house. Debrina creates the most amazing whimsical art and digital images. Check out her blog - http://whimsicalworldoffairies.blogspot.com/. These are the projects we made today - sooo adorable!
We had so much fun creating these fairytale pieces and learning new techniques. Below is a picture of Maryl with Debrina, as she's showing us her sample project for the class.
The theme of the party was shabby chic...check out this beautiful tablescape.
And here we are working on our project...
Here are just a few of Debrina's projects. These belong to my sister Lana, a huge fan of Debrina.
Maryl received some wonderful gifts...
Vintage blue coat from Pat
Embellished wreath from Frances
Shadow box from Ruby
Lenci Doll from Frances
Another Lenci doll from Frances
Fingerless gloves and paper tray from Diana
Not pictured, Lana's gift (trip to Texas flea market & my gifts of assorted shabby chic bits & pieces)
It was another great day of creating, being with family and friends. What a perfect setting for a shabby chic party. Debrina was a fabulous teacher, fun, well organized and so talented!

Thursday, February 9, 2012

My New China Doll

I love the mix of vintage china doll heads with vintage tin. A couple months ago I picked up some vintage kitchen toys. I knew when I saw the colander, that it would make for a perfect skirt. I created this altered doll this week.
My sister Lana gave me a bunch of china doll heads for my birthday...I used one of them for this doll. I started with these pieces...
I stacked them upon each other like this...
I added a pot upside down on top of the colander for the body. I used polymer clay to mold the head piece unto the pot. I then embellished the doll with lace, ribbon and bling. This was so much fun, I can't wait to make more.

I also wanted to share my finds from this month's Alameda Pt. flea market.
I love to buy vintage photos made of tin. They make great art, but it's still hard for me to cut them up. I'm into collecting pedestal candy dishes - they make great holders for small bits. I found various rhinestone pieces at great prices. I bought a group of pretty colored embroidery thread. Picked up this cute necklace made from a salt shaker. And still looking for vintage pickup trucks, to make more pin cushions.

Saturday, February 4, 2012

Twilight Birthday Party

A couple weekends ago, we celebrated my sister's bday by having a wonderful paper cake workshop taught by Diana Giambrone (see earlier post). The theme of the party was Twilight/Pattinson.
I just wanted to show you some of the creative gifts we all gave my sister for her bday. Her one request was for the sisters to create a Robert Pattinson calendar.  This was inspired by the recent calendar project I did with the Catherine Moore stamps.

Here are the calendar pages my sisters and I created...
This was a great idea for anyone who's a Robert Pattinson fan!

Below are some more fun Twilight gifts we gave my sister.
My sister Pat created a beautiful 3-D paper bag album, Diana G made the 2 unique Pattinson's on a stick (one of them being fully articulated), and I made the shrinky dink necklace from his photos and magazine covers.

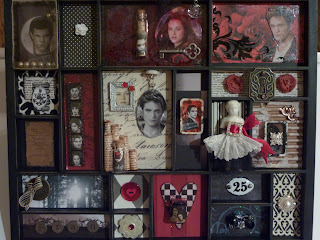
Ruby created this outstanding Twilight shadow box...we were all amazed and impressed with this project. Each section was so adorable...we all loved it!
Then today, I received this thank you note from my sister which was so appropriate. She transformed a party invitation into a Twilight Thank You note...how great is that! She added the black heart trim at the top, the Love red ribbon, the flowers and then stamped "twilight" in the corner.