Sunday, January 27, 2013

Selling Necklaces on Etsy!

I've been a busy girl lately and have been creating plenty of necklaces that I've finally decided to sell! Some of the necklaces resemble the ones I made for Tim Holtz's booth at the CHA show, and some are necklaces that resemble ones that I've made in the past for myself. The twelve necklaces shown below are now available in my etsy store:
Here's a close up shot of each one...
Sold
Sold
Sold
This is my first time creating jewelry to sell and it was a fun experience, but took more work than I thought.   I'm also willing to take custom orders if there's something you want and it's not available; just email me and we can work out the details.

I hope you're having a great weekend, thanks for visiting!

Sunday, January 20, 2013

Samples Made for Tim Holtz @ CHA

My December was busy with not only getting ready for the holidays, but I was also making samples for Tim Holtz, to be used at the CHA (Craft Hobby Association) winter show in Anaheim. I wasn't able to let anyone know until after the show was over. It all started in November, when I got an email from Paula Cheney, the creative coordinator for Tim and it ended with me sending in over 10 samples to be used in their booths. I was so excited, so honored, yet so nervous! Below are the necklaces I made - as displayed at the show.
I was sent a couple of boxes of Tim Holtz's products in late November...

It was like an early Christmas present, how cool it was to receive a box full of amazing embellishments.
I made a variety of samples, some of which were accepted, some that Tim wanted tweaked and some that were not used. Below is everything I made...
This was one of the pieces Tim suggested I change to something else...so my necklace above became 5 cards below...
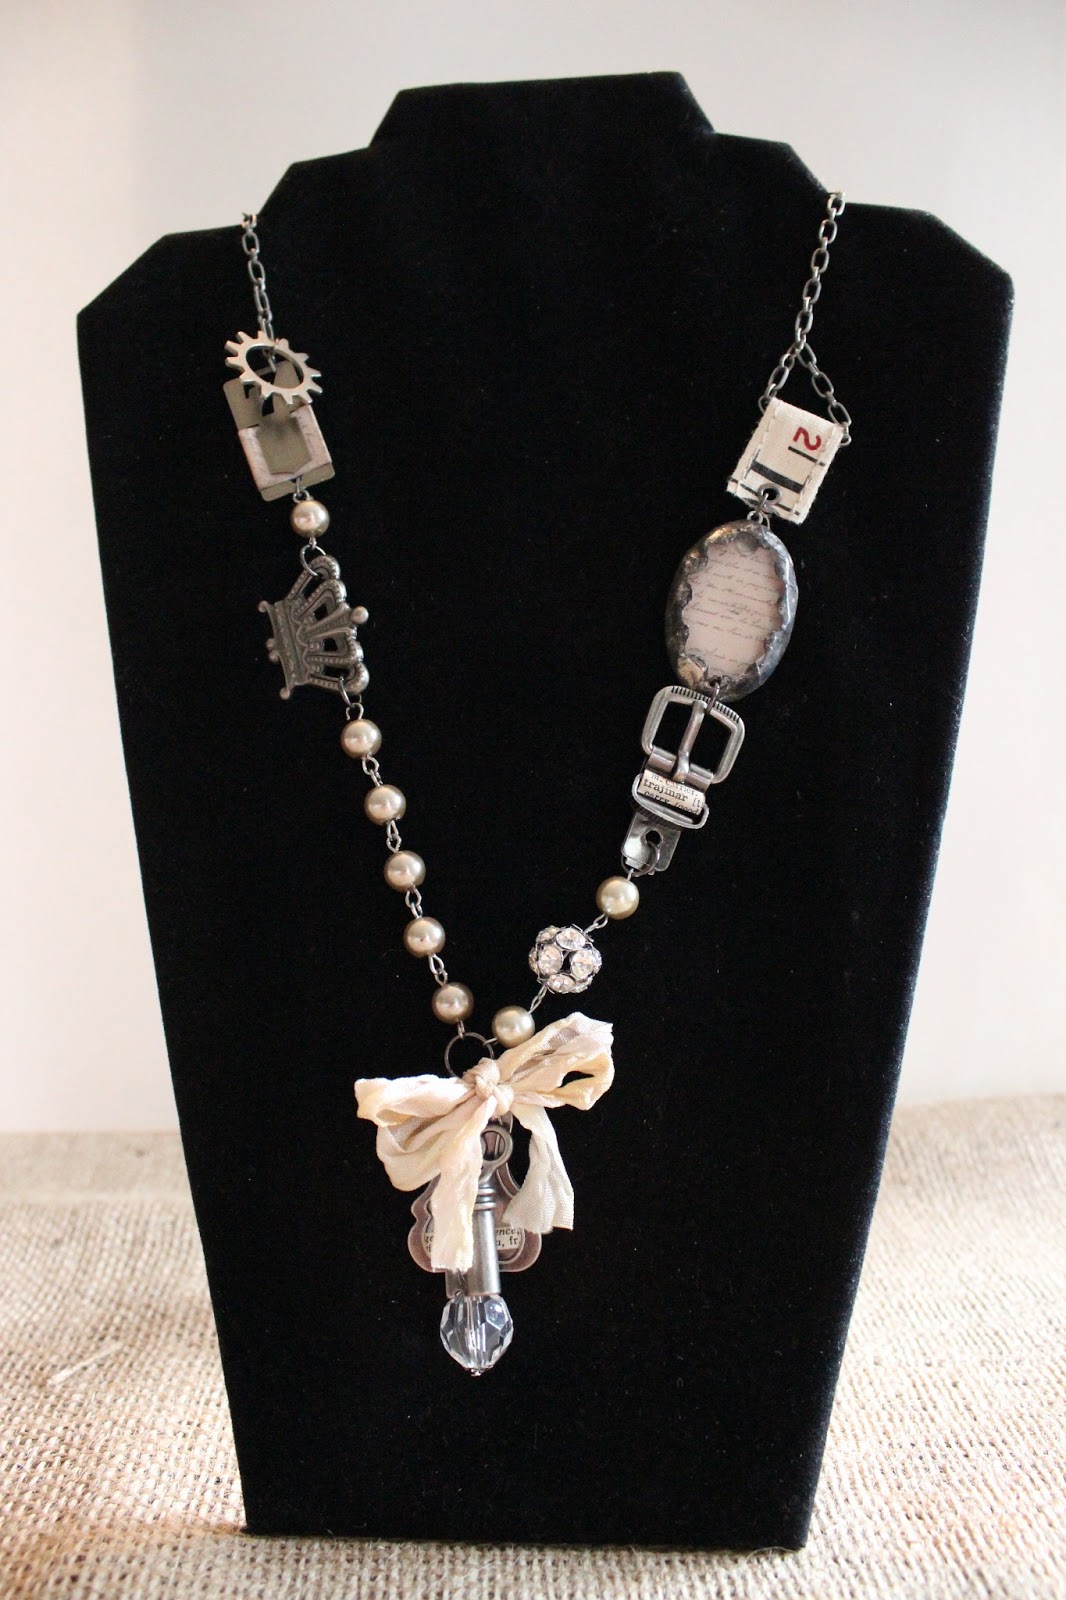
Necklace made from the Idea-ology line...
This was was accepted
This one was not used
Another necklace made from the Idea-ology line....
This was accepted
I made a necklace from bottles, but Tim suggested I put the bottles in a shadow box.

So, this is what the end result was...
I made some mini banners hanging from hangers mounted on an old journal...
however Tim suggested I put the mini banners on canvas...
These were accepted
I made a college in a small wooden box...
This was accepted
Tim had these great letter tiles that i wove around a wire vase...
However, this was not used
I altered a bed with some of his products...
Unfortunately, this was also not used
I used one of the bird cages and wire wrapped beads and other embellishments around it.
This was accepted
Because I love making paper dolls, I had to make a couple of doll related items...
These were not used
Below are some cards I made with one of his face stamps...
These were accepted
Another necklace made from the Idea-ology line...
Tim asked that I add a new locket at the bottom
This was accepted
This is what my craft table looked like for about a month...
There's a great youtube video of one of Tim's booth on this web site from Noell Hyman: http://www.youtube.com/watch?v=nncVQ6jtOgA. And also on One Lucky Day blog: http://www.2gypsygirls.com/. And here's a link to Tim's recap of the show: http://timholtz.com/cha-winter-2013-show-recap-idea-ology/ Both Tim and One Lucky day will be posting more pictures from the CHA show next week.

I'm so thankful to Paula and Tim for giving me this great opportunity to create for them. What an honor it was to be in such great company. Putting on the CHA show is an incredible amount of work and these guys go all out!

I've also decided to create some similar necklaces to sell on etsy. I hope to have them posted by the end of the week, stay tuned.

Sunday, January 13, 2013

Washi Tape Shadow Box

This weekend I was in Alameda and went to Beverly's craft store. Beverly's always seems to carry slightly different product than both Michael's and Joann's, so it's fun to visit it once in awhile. I was thrilled to find this wonderful shadow box. I brought it home not sure whether I was going to paint it, stain it, add paper, etc. After seeing my huge collection of washi/tissue tape; however, I decided to cover the box with them. The picture below is the finished project:
Here's some pictures that show the step-by-step progress...
Although the shadow box is large (the dimensions being 15.5" in length, 11" high and 2.75" deep), it's very lightweight
And the best part: it has two layers. The top layer is split into halves and each half easily lifts up. The box costs $12.99 and right now all the boxes are 30% off. The Alameda store is currently sold out of this style, but they said they'll be getting more soon.
I didn't prime the box; I just started on one end and started taping the edges all the way around.
I did the top lid first, using a variety of widths, colors and patterns.
Then I did the lower portion...
Surprisingly, washi/tissue tape holds pretty well to wood. In places where it was peeling, I added a touch of glue.
I found using an exacto knife works great around the hinges.
 Filling the box was lots of fun, too. I put paper in some of the squares and left some blank.
My next post will be the reveal of the secret projects I worked on in December! (Hint: Tim Holtz).

Saturday, January 12, 2013

Finally Finished My 2nd Quilt!

I made my first quilt 17 years ago for my son, Christopher. Three years later when I had my second child, Rachel, I knew someday I had to make a quilt for her too. I started her quilt 3 years ago, inspired by a picture from the book Material Obsession. Well, this past week, I finally finisher her quilt! If you've been following my blog, you've seen the quilt in progress. I'm happy to share with you the finished quilt.
The quilt is a series of patchwork dolls and houses.
I had so much fun embellishing the panels with buttons and baubles. 
Here's one close-up of a doll panel...
And below is the picture of my son's quilt...not as colorful, but had more detailed quilting.
I'm so glad I only had two kids, cause these quilts are a lot of work! Does anyone need some quilting supplies? :-)