Sunday, November 30, 2014

More Doll Drawings

I recently painted some new dolls, this time with some background colors and new tissue printed tops.
Like my hand drawn background paper? I just realized I photographed them upside down...haha.
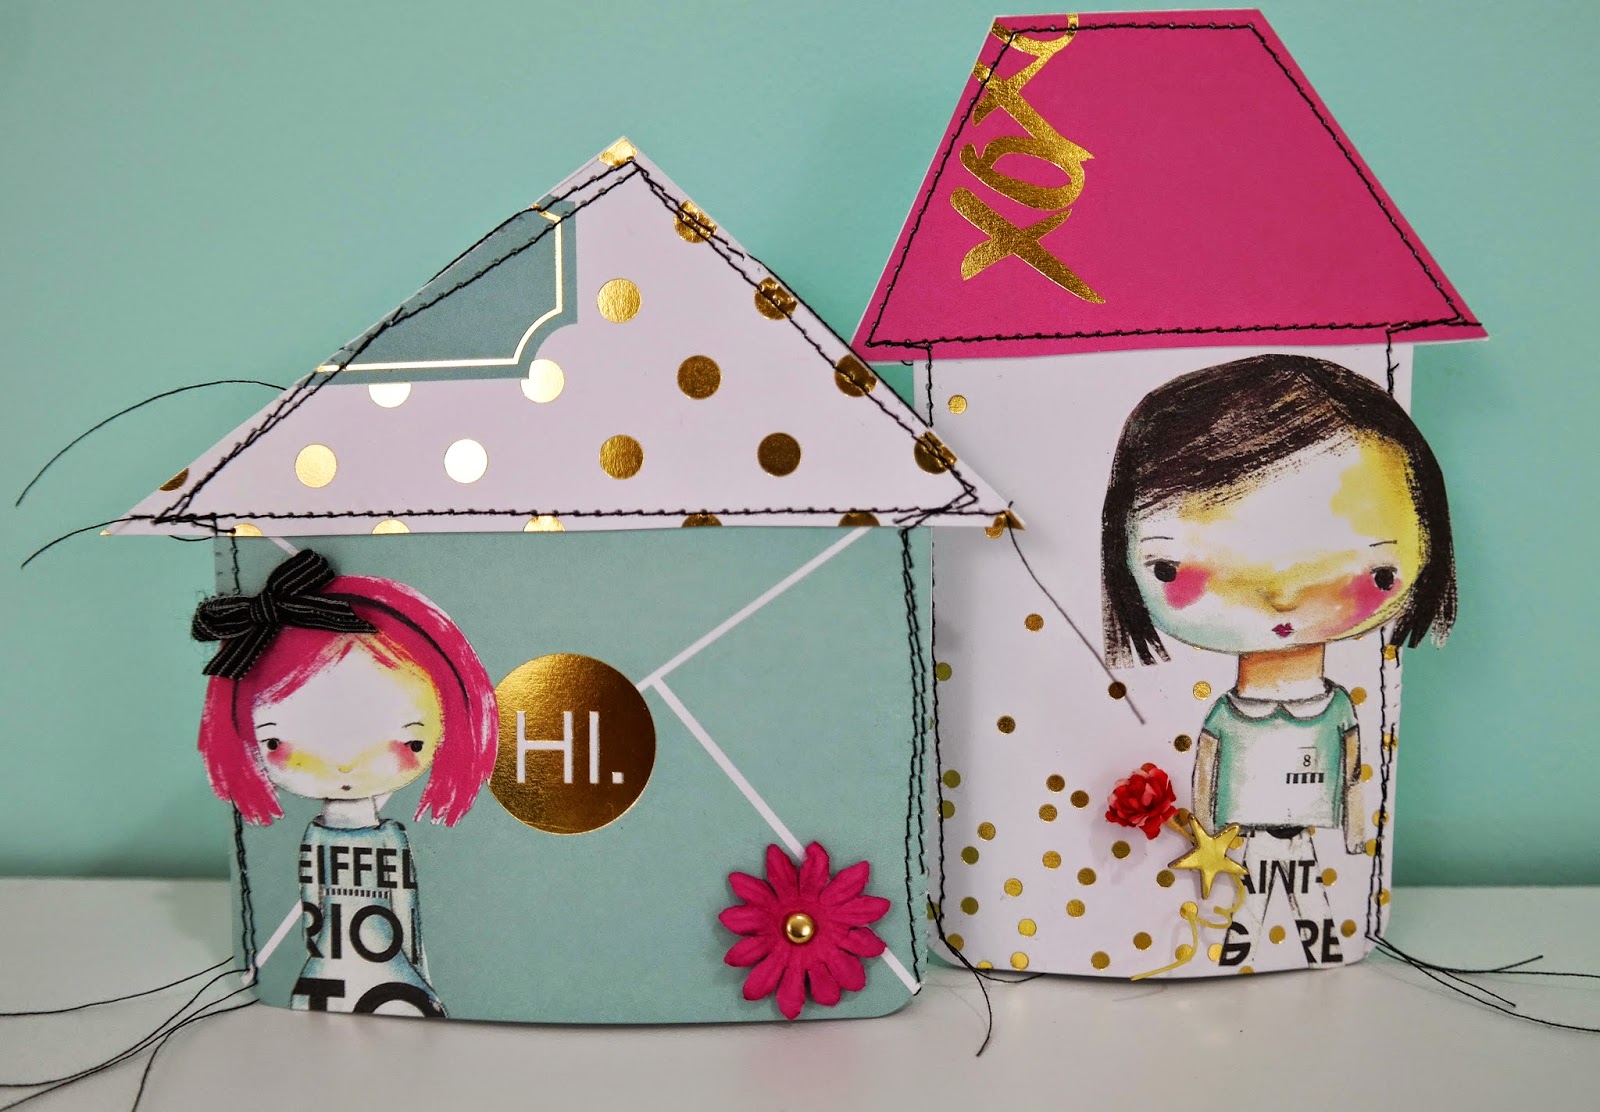
I scanned the images to my computer and was able to make print greeting cards from the drawings...
I added hand dyed stamped mini tag necklaces to each girl, to give them a cute accessory to wear. I hope to list my cards and stuffed dolls on etsy in the new year. By the way, I also need a name for these dolls, if anyone has a suggestion, please leave me a comment. If I choose your name, I'm definitely giving you a stuffed doll!

And as a last note, I'm thrilled to be published in the latest issue of Somerset Gallery, Winter 2015.
The editor of this magazine, Danielle Mohler, was sweet to publish lots of my pieces. Below are the pages that I'm in...
Domino dolls made using Catherine Moore's stamps
Paper doll made from Catherine Moore and Leavenwoth Jackson stamps
Seaside art journals made with RedLead products
Paper dolls inspired from Claudine Hellmuth
Altered mini postcards
Seaside art bottle made from RedLead products
Mini tags made from 7 Gypsies tags
Seaside ATC cards made from RedLead products
Mini coin envelop book necklace
Thank you Danielle and Stampington for including my work in this lovely publication, along with so many other wonderful pieces.

 I hope everyone had a great Thanksgiving holiday! Thanks for stopping by. :-)

Sunday, November 23, 2014

Great Workshop with Debrina Pratt!


In honor of my sisters, Lana & Diana's birthday, we had a very special workshop with Debrina Pratt this weekend. We made the sweetest cage girl piece that I just love! Pictured below is the piece I made...
Lana hosted the event in her lovely home, which was such a perfect setting for such a magical day.
We had a great time creating, laughing and eating! Happy Birthday Lana & Diana - what a fun way to celebrate your birthdays! Debrina, thank you for sharing your wonderful images and techniques with us, you're truly a great artist and teacher!
And I have to show you how I used my stuff dolls as tags on my sister's bday gifts...
And last but not least, check out the Somerset Blog Post - where I was featured as a guest artist, showcasing how to make my stuff dolls!
Have a Happy Thanksgiving everyone!

Sunday, November 9, 2014

Make Your Own Ribbon Tags

This week I made some new dolls and some ribbon tags.
I was inspired to make the ribbon tags after purchasing similar ones from Scrapbook Territory, in Berkeley.
My creations are on the right
Below are some steps of how I made the ribbon tags, using washi tape instead of ribbon...
For the top portion, cut small pieces of scrap paper and fold in half
Gather some washi tape and a piece of card stock
Cover the card stock with washi tape
I laid two strips side by side matching the patterns as best as I could.
Cut each pattern into strips
Cut two banner shape pieces from each strip
Sew pieces together with a button and embroidery thread
Pictured below are my ribbon tags on some fun Project Life cards called, Little Picasso - I love the doodle borders.
Here are more samples from the Project Life Little Picasso set...
And then last but not least, here are six more stuffed dolls I made this week...
My own hand drawn & painted creations.

I can't believe it's November already...time to start planning my homemade xmas cards - stay tuned.

Sunday, October 26, 2014

Victorian Post Cards

This weekend I was inspired to make some Victorian tags, which ended up turning into Victorian postcards.
Awhile ago, I purchased these lovely Anna Griffin tags and I've been wanting to make something with them...
I bought them from HSN, but they're currently sold out. You get almost 300 beautiful tags. I cut out some Victorian images from one of the Dover illustration books, "Victorian Fashions". Next, I stamped some background script onto the tags, added some Tim Holtz index labels and then I glued on the Victorian ladies.
I could have stopped there, but for some reason it still felt unfinished to me. So I decided to glue vintage text paper onto index cards and trim them to size.
Afterwards, I sewed the tags onto the index cards.
Then I decided to sew a bit of vintage lace and a button to each of the tags.
As a final touch I stamped some mini tags using the Stampology "Worth Repeating" set with different phrases so I can use the postcards for different occasions. Since they're cling stamps, you can easily cut the words apart and position them as you need on your acrylic block. Then I just added the tags to the postcards!
I could see sending these postcards in a vellum envelope, so that that the postcard image would peak through!

Yeah Giants!

Sunday, October 19, 2014

Project Life Projects

Turning Project Life cards into dolls and houses...
I was at my local craft store and found this Project Life Kit by Heidi Swapp.
I love the colors: gold, pink and mint cards.

I don't do the Project Life albums, but I do love the cards. My thought was to turn the cards into dolls and houses. I started with attaching a head on top of one of the large cards.
Then I cut the card into a dress shape and added heart wings.
I sewed a backing to the doll and stuffed it to make it 3D.
I made a smaller version too.

Then I worked on some houses. I took a couple cards and cut them up and sewed them together.
I added some of my "Mindy Lacefield" dolls I painted awhile ago and reduced them in size.
All of the dolls and houses are  slightly stuffed, so they can stand up on its own...

Turning Project Life cards into dolls and houses...it's a good thing!

Hope you had a great weekend!